The scenario for this rule example is that an application has users that hold an NFT in their wallet associated with the project. A fungible token release is coming and includes an allocation to airdrop some of the fungible tokens to the existing NFT holders.
There will be three different token lockup periods depending on when the NFT was obtained, which are:
- Early Adopter
- Loyal Backer
- New Ally
These categories will be defined in the rules engine as Tags. In this example, the tags will represent how long the wallet has been a supporter, but you can use tags for any arbitrary category you desire.
The rule that will be leveraged for this example is the Account Min/Max Token Balance rule, which relies on these tags to determine whether or not the tagged account can transfer their tokens (based on defined minimum required balance).
Get Started
This guide requires that you’ve already deployed the client contracts and are able to login to the rules portal and view your application.
Decide the Minimum Balance per Tag
You can define a distinct minimum token balance for each tag type, which works well for the use case here.
| Tag Name | Token Allocation |
|---|
| Early Adopter | 1,000 |
| Loyal Backer | 500 |
| New Ally | 100 |
If you wanted to airdrop the same amount to each token holder, regardless of
tag type, simply use the same minimum balance for each tag type.
Define the Hold Times
Next, you need to decide the hold times associated with each tag. These values are defined in hours. The guide will proceed with the following values:
| Tag Name | Hold Time | Value in hours |
|---|
| Early Adopter | 30 days | 720 |
| Loyal Backer | 60 days | 1,440 |
| New Ally | 90 days | 2,160 |
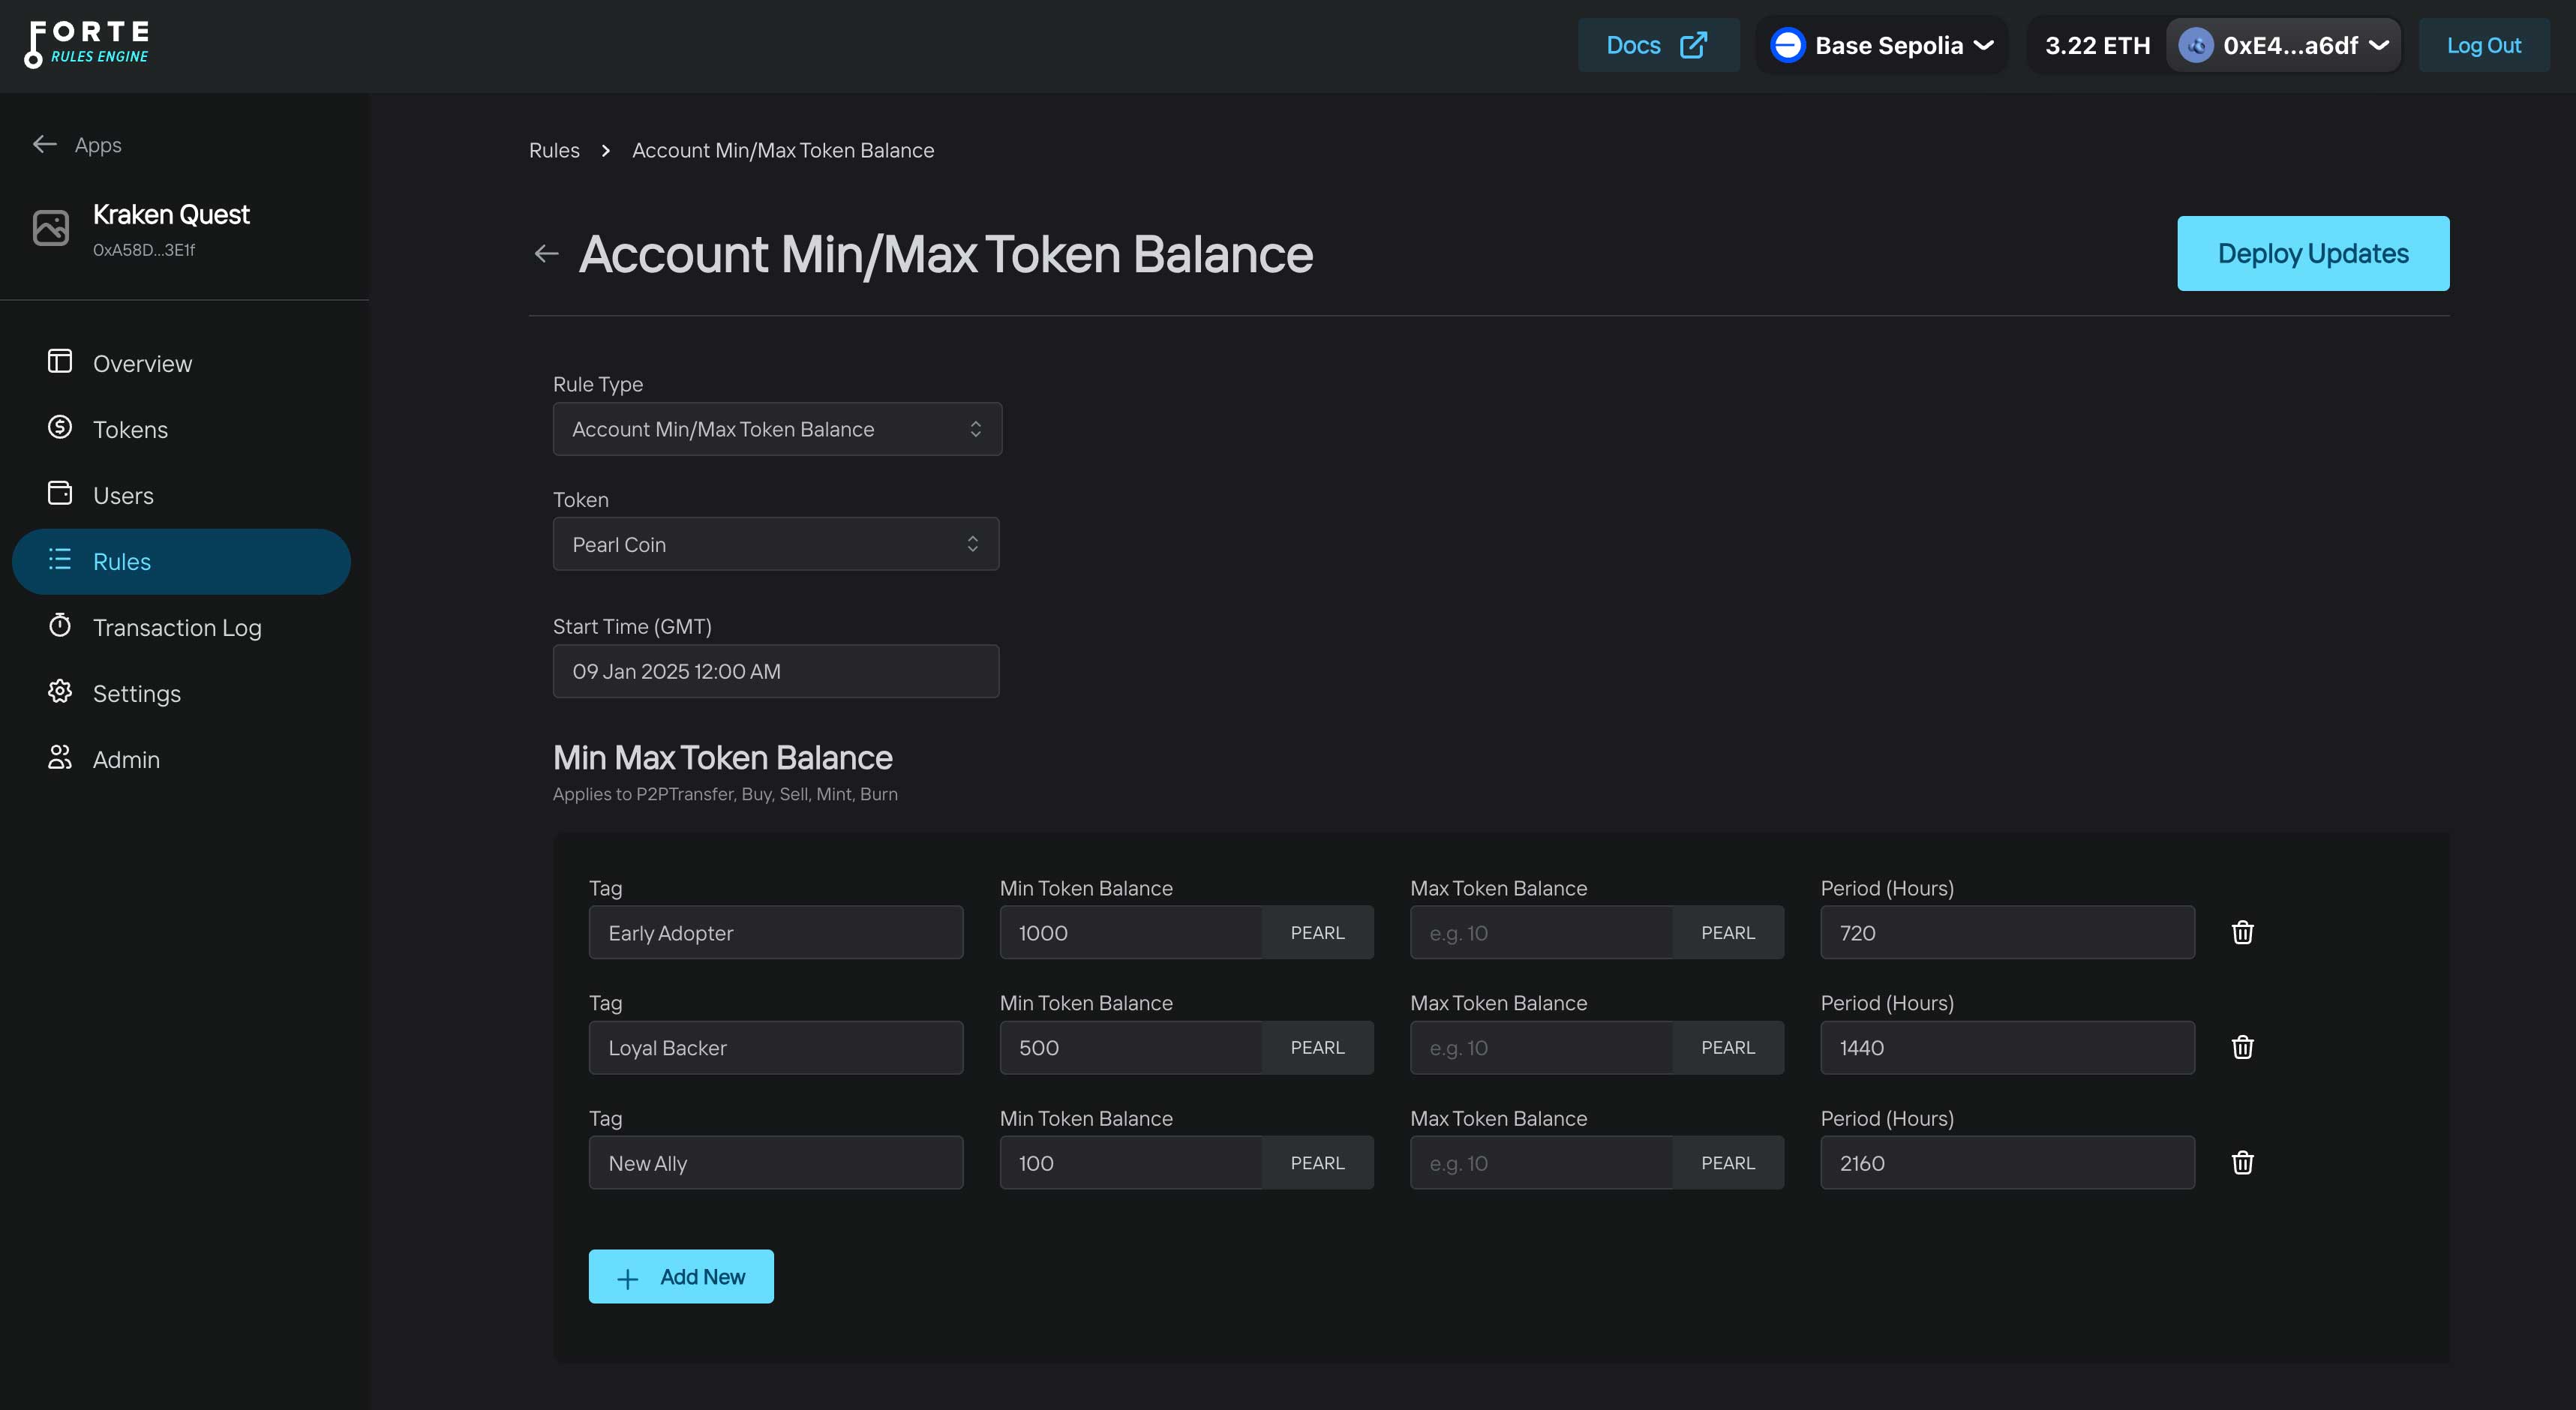
Add the Rule to the Protocol
Select the Rules tab in the left hand navigation of the rules portal once you’ve selected your deployed application.
- click the
+ Add Rule button and select the Account Min/Max Token Balance option to proceed.
- select an ERC-20 token that is registered with your application
- set an arbitrary start time that is before the airdrop
- fill in the tag names, min balance and period settings
- click the
+ Add New button to create additional tags
- click the
Deploy Updates button to create the rule!
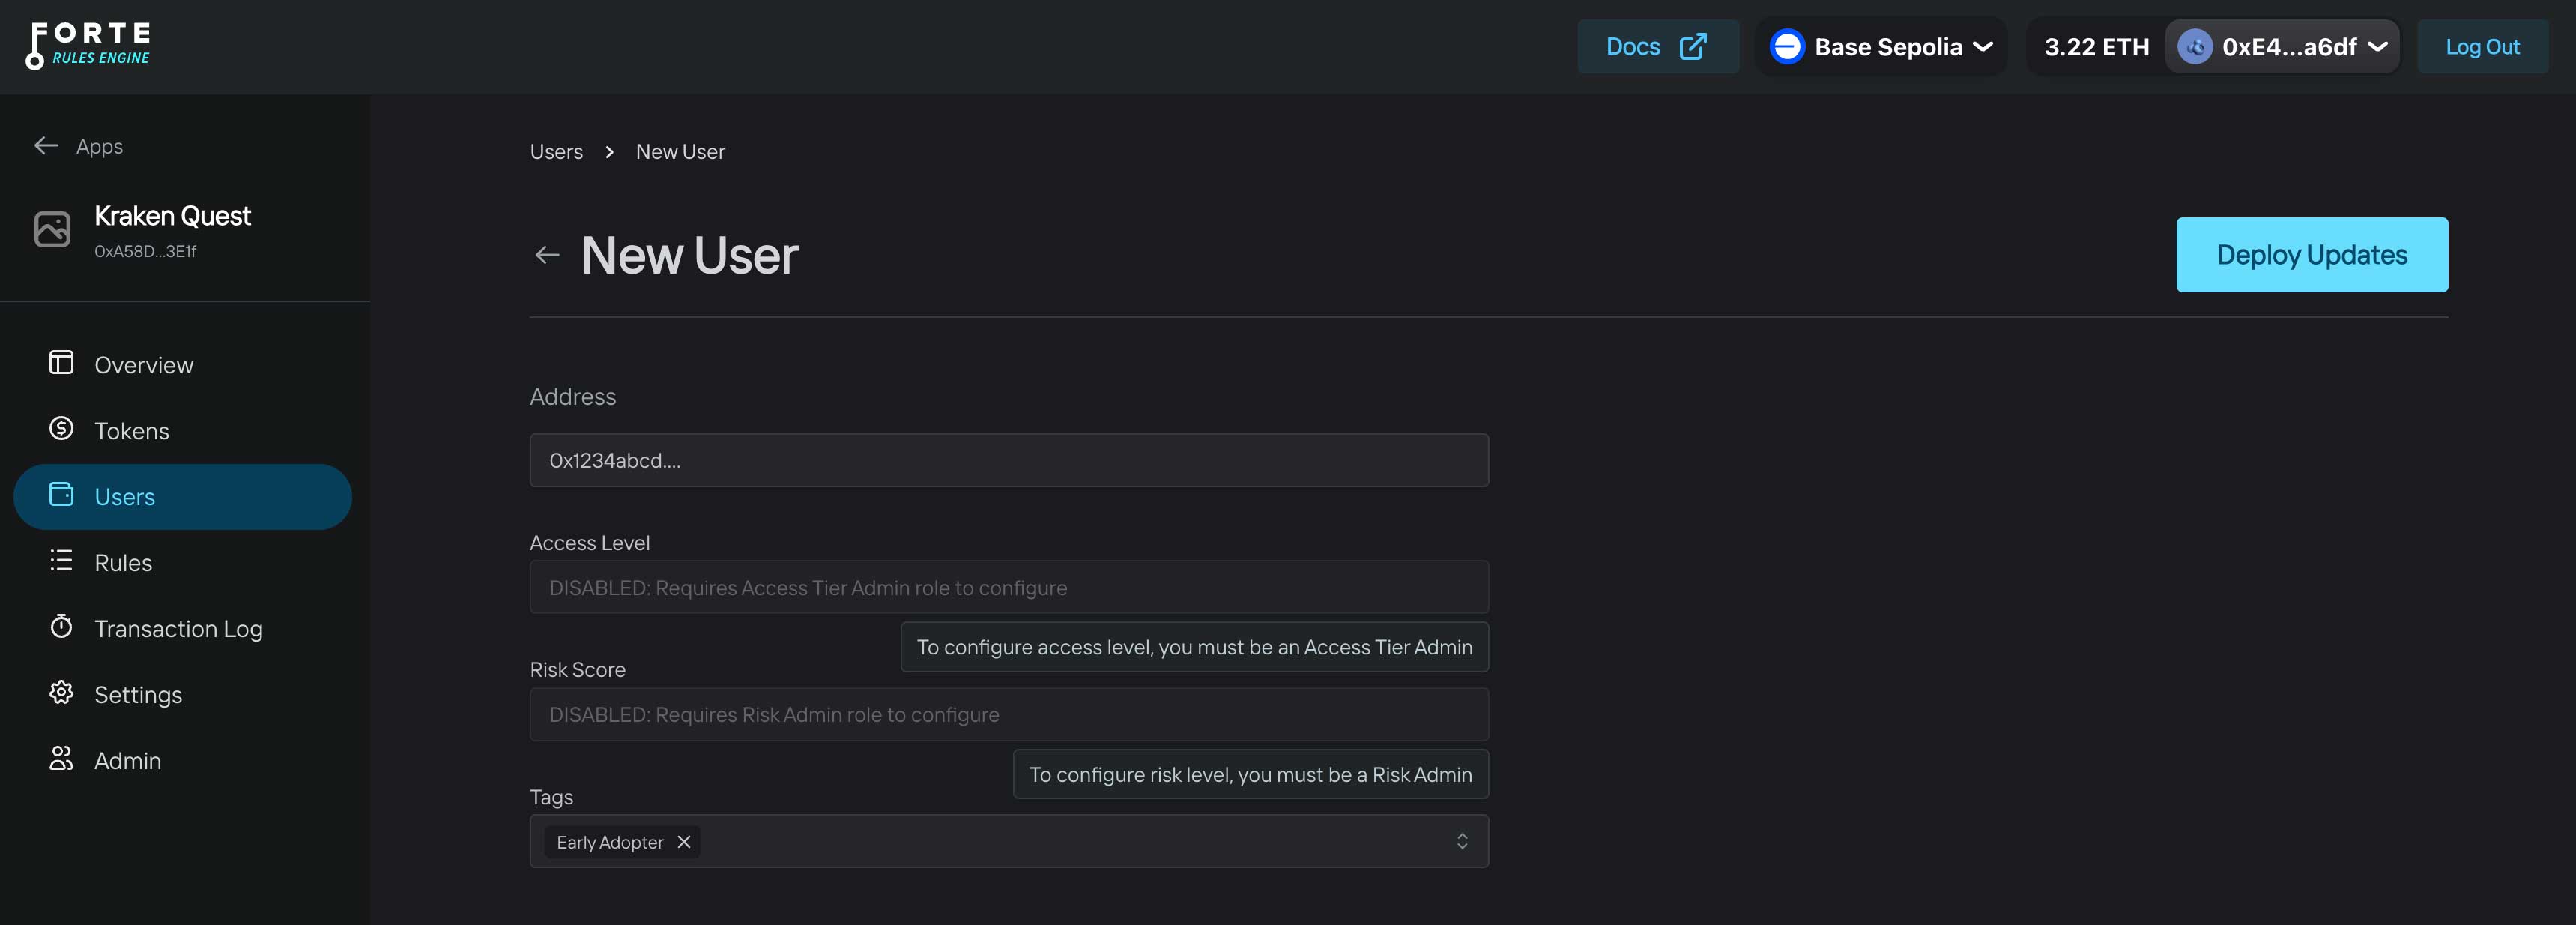
Before you actually airdrop the token allocations to the existing NFT holders, you’ll need to add a tag to them so the protocol properly limits that wallet’s ability to transfer the airdropped tokens.
Consider an account with the public address 0x1234abcd... in your application that should be assigned the “Early Adopter” tag. You can add the tag via the Users tab within the rules portal as shown below. The tags will be available for selection after the rule is successfully created in the previous step.
If your use case requires bulk updating many addresses with tags you’ll want to write a script to accomplish this. Refer to the CLI version of this guide for more information on obtaining the bytes32 values for the tag names and the function your script will call.
Wrapping Up
You should now understand at a high level the specific steps required to enable this type of rule in your application. This guide purposefully did not cover the generalized steps of how you’d actually distribute the tokens after the rules are configured.
Lastly, this particular guide is only one example that illustrates one way you can leverage tag based rules to enforce minimum token balances for a specified period of time based on arbitrarily defined categories.
Let this be an inspiration for even more sophisticated use cases!
If you have questions about this guide and how the Forte Rules Engine can enable compliance and incentive alignment in your application send us a message to talk more!